First Layer Not Sticking: What 3D Printer Bed Adhesion Depends On
LayerWalker is a participant in the Amazon Services LLC Associates Program. We may earn a commission when you buy through links on our site, at no extra cost to you.
Wash the plate with dish soap and hot water. Skin oil from handling is the single biggest cause of first layer adhesion failure, and no amount of Z offset tuning fixes a greasy plate.
Adhesion problems feel like a levelling problem, so that is where most people start. It usually is not. Work through the causes in the order below and you will fix it faster.
Where to buy


Comgrow Ender 3 V3 KE PEI Spring Steel 235x235mm, Texture PEI Sheet

First layer not sticking: what bed adhesion actually depends on
Bed adhesion is not one property. It is the product of four things, and three of them cost nothing to fix. The surface has to be clean, because a fingerprint is enough to release a corner. The first layer has to be squashed to the right thickness, because plastic laid too high touches the plate at a few points instead of across its full width. The plate material has to suit the filament, because PETG grips smooth PEI too hard and PLA grips a worn textured sheet too little. And the air around the part has to be still, because a draught cools a corner faster than the bed can warm it.
Adhesive is the fifth thing, and it is the one most people reach for first. It belongs at the end of that list rather than the start: a glue stick on a dirty plate at the wrong Z offset holds the print for three layers and then lets go, which reads as the adhesive failing when it never had a chance. Our bed adhesive page covers the cases where a product genuinely is the answer, and the sections below work through the four that come first.
1. Clean the plate properly
PEI works by surface energy. A fingerprint reduces it locally, which is why prints often stick everywhere except one patch. IPA removes some contaminants but smears oils around rather than lifting them. Dish soap and hot water in a sink, then dry with a clean cloth, is what actually works.
Handle the plate by its edges afterwards. If you pick it up flat-palmed you have just undone the cleaning.
2. Check the Z offset with a real test
A correct first layer looks like slightly flattened lines fused into a solid sheet, with no gaps between them and no translucent squashed patches. Too high and you see separate round strands with gaps. Too low and you get a rippled, ridged surface where the nozzle is ploughing.
Start here, then adjust Z offset in 0.01-0.02 mm steps.
3. Match the plate to the material
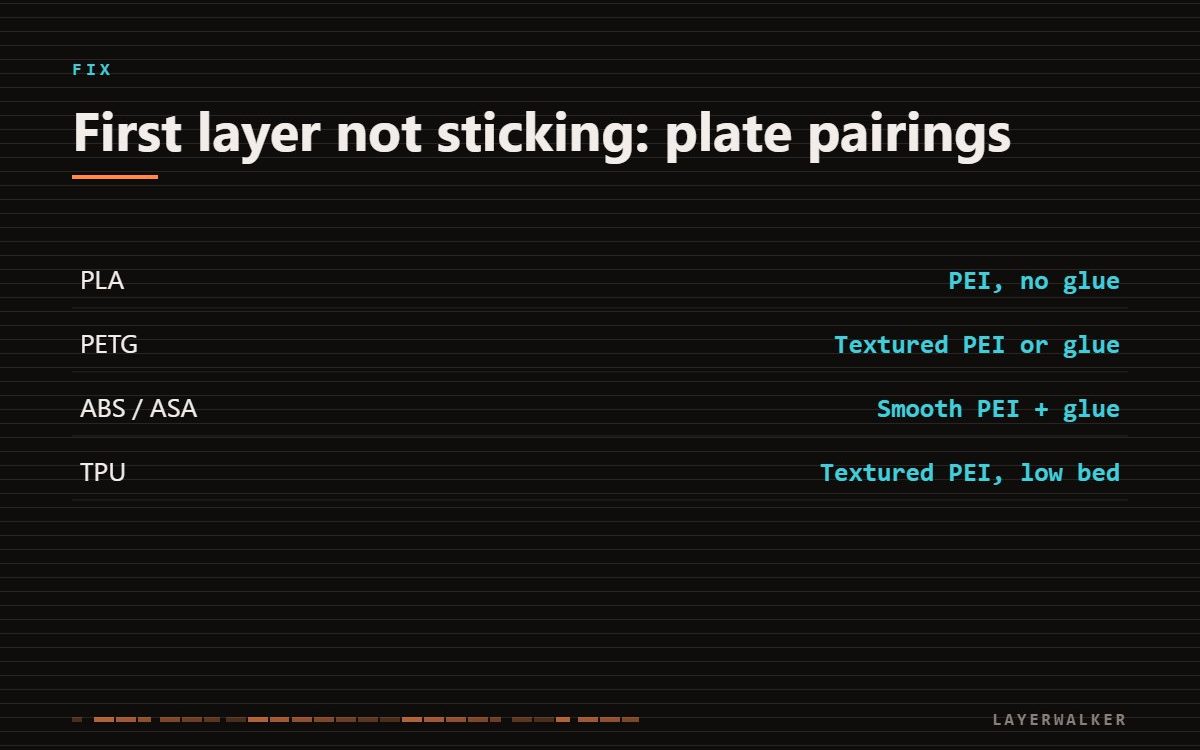
Not every plate suits every filament. PETG bonds so aggressively to smooth PEI that it can tear chunks out of the sheet — use textured PEI or a glue stick as a release layer. PLA is happy on almost anything.
| Property | Value |
|---|---|
| PLA | smooth or textured PEI, no glue needed |
| PETG | textured PEI, or smooth PEI with glue stick as release |
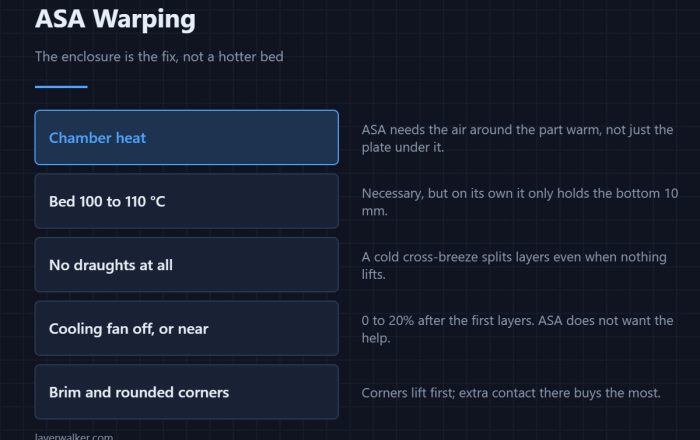
| ABS / ASA | smooth PEI plus glue stick, enclosure closed |
| TPU | textured PEI, low bed temperature |
| PA / Nylon | garolite or PEI with glue stick |
First layer lifts, curls or never adheres
Contaminated plate, wrong Z offset, or a plate and material mismatch
- Wash the plate with dish soap and hot water. Dry it, then handle by the edges only.
- Print a first layer test patch and look at the lines. Adjust Z offset in 0.01-0.02 mm steps.
- Raise the bed temperature 5 degC and reprint.
- Turn part cooling off for the first two layers.
- Slow the first layer to 20 mm/s so each line has time to bond.
- Add a brim for parts with a small footprint.
Each material fails differently: PLA not sticking is usually nozzle height or a dirty plate, PETG not sticking is usually the nozzle being too close, and ABS not sticking is a chamber problem before it is an adhesion one.
On a Prusa, check the printer is not reporting a code first — 13109 means it cannot detect the steel sheet, which stops the print before adhesion matters.
Draughts
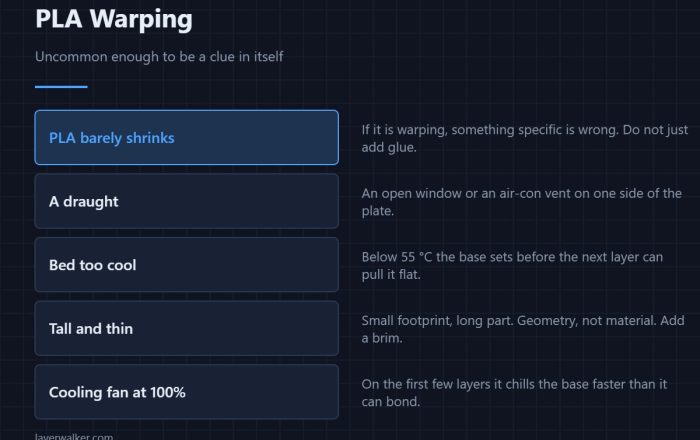
An open machine near a window or an air conditioning vent loses first layer adhesion in ways that make no sense until you notice the pattern. If failures cluster on cold days or on one side of the plate, put a box over the printer and try again.

LayerWalker
Print defect diagnosis, calibration procedures and parts that actually fit. Corrections welcome through the contact page.