Best Cura Settings: The Twelve Numbers That Actually Matter
LayerWalker is a participant in the Amazon Services LLC Associates Program. We may earn a commission when you buy through links on our site, at no extra cost to you.
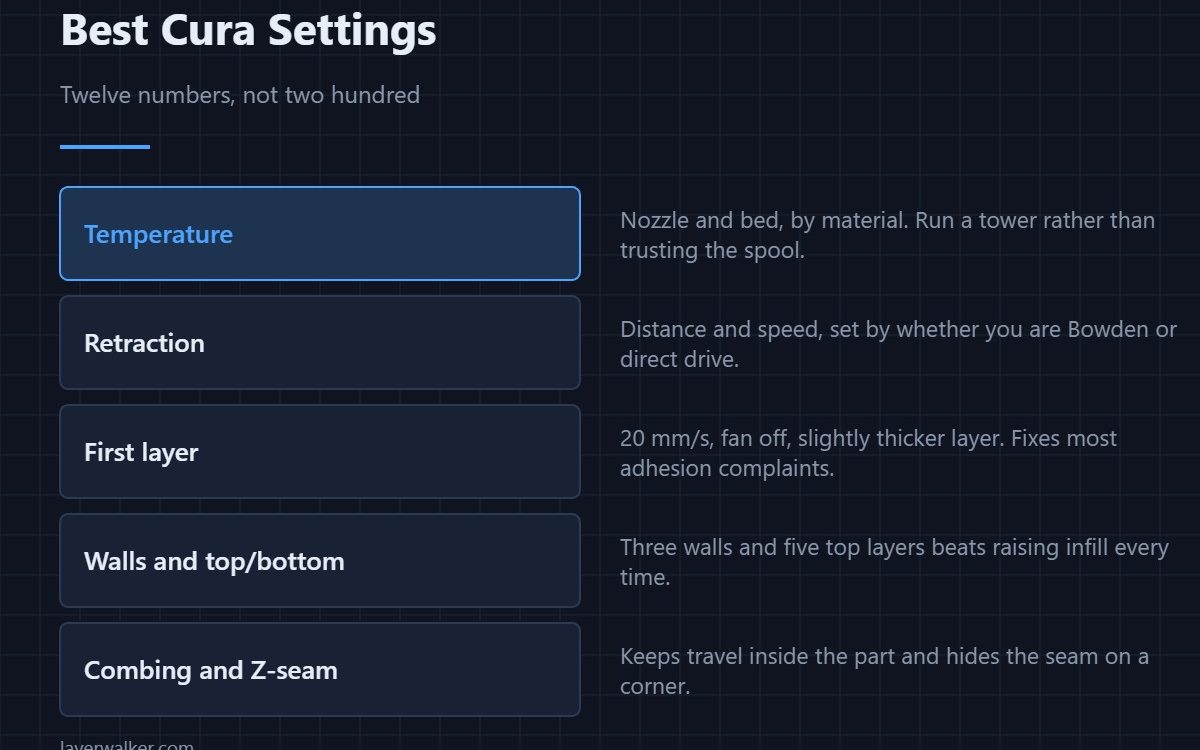
The best Cura settings are about twelve numbers, not the two hundred the interface offers. Temperature, retraction distance and speed, first-layer speed and fan, wall count, top and bottom layers, infill density and pattern, combing and Z-seam. Get those right and the rest of the settings genuinely do not matter for most prints.
Cura exposes more settings than any other free slicer, which is both its strength and the reason people lose evenings in it. The list below is the order worth working through; everything outside it is a refinement.
Where to buy


Temperature, first
Nozzle and bed, set per material and per brand. The spool label gives a range wide enough to be useless, so run a temperature tower and take the lowest band where layers still bond. Bed numbers by material are in bed temperature.
Retraction, set by your extruder layout
This is where most bad profiles go wrong. A Bowden printer wants roughly 5–7 mm; a direct drive wants 0.5–1 mm and will jam if given the Bowden number. Retraction speed around 40 mm/s for PLA, slower for PETG. Full detail in retraction settings.
First layer
20 mm/s, fan off or very low, and a slightly thicker layer than the rest. These three changes fix the majority of adhesion complaints without touching the bed or the plate — see first layer problems if it is still wrong afterwards.
Walls before infill
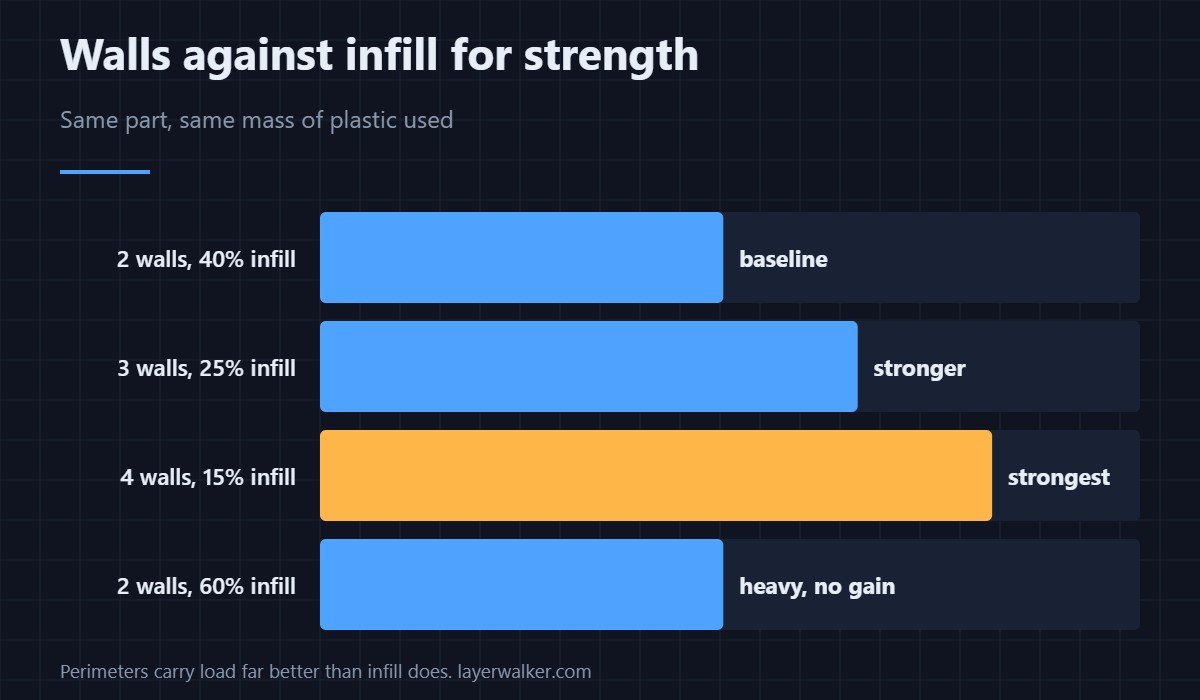
Three walls and five top layers beats raising infill density every time, for the same mass of plastic. Perimeters carry load; infill mostly supports the top surface. Going past about 40% infill is wasted material on nearly every functional part. Which pattern to pick is in infill patterns.
Combing and Z-seam
Set combing to keep travel inside the part where possible, which reduces stringing without touching retraction. Set the Z-seam to a sharp corner rather than letting Cura choose, so the seam hides on an edge instead of wandering across a curved face — more in seam position settings.
What to leave alone
Ironing, adaptive layers, fuzzy skin and most of the experimental section are features, not fixes. They are worth exploring once your basic profile is sound, and they will not rescue a print that is failing for another reason. If you later move to OrcaSlicer, your tuned values transfer — see importing Cura profiles.
Best Cura Settings FAQ
What infill percentage should I use?
15–25% for most parts. Add walls rather than infill if you need strength; past 40% you are adding weight and print time for very little gain.
Why are Cura’s default profiles worse than PrusaSlicer’s?
They are tuned conservatively across a huge range of printers rather than for yours specifically. Expect to tune; the comparison is in PrusaSlicer vs Cura.
How do I find a setting I read about?
Use the search box above the settings list, and make sure visibility is set to show all settings — Cura hides most of them at the default level.
Do I need to change anything for PETG?
Yes: higher temperature, more retraction distance at a slower retraction speed, less part cooling, and a slightly larger first-layer gap. A PLA profile applied to PETG is why so many first PETG prints fail.

LayerWalker
Print defect diagnosis, calibration procedures and parts that actually fit. Corrections welcome through the contact page.