Marlin Firmware: What It Does, and When a Reflash Is Worth It
LayerWalker is a participant in the Amazon Services LLC Associates Program. We may earn a commission when you buy through links on our site, at no extra cost to you.
Marlin firmware is the program running on your printer’s own control board: it reads the G-code, drives the steppers, and manages the heaters. You do not reflash it for fun. You reflash it for a reason — adding a bed probe, fitting a new board, or enabling thermal runaway protection that the factory build left out. Everything else is a setting you can already change from the menu.
Marlin runs the majority of bed-slingers sold, including every Creality Ender 3 variant. Because it is compiled rather than configured at runtime, features that were not switched on when the factory built the binary simply do not exist on your machine, and the only way to add them is to build a new one.
Where to buy


When a reflash is actually justified
- Fitting a probe. Bed leveling has to be compiled in, and the probe offsets entered. This is the most common reason by a wide margin.
- A new control board. A silent 32-bit board ships with generic firmware that does not know your bed size or thermistor.
- Thermal runaway protection. Some older factory builds shipped with it disabled. This one is a safety issue, not a feature.
- Linear advance and input shaping. Real quality gains, but only after the mechanical basics are sound.
If your goal is faster printing and better quality rather than a specific missing feature, the honest comparison is in Klipper vs Marlin — Klipper moves the configuration onto a host computer and sidesteps the memory problem entirely.
What the process involves
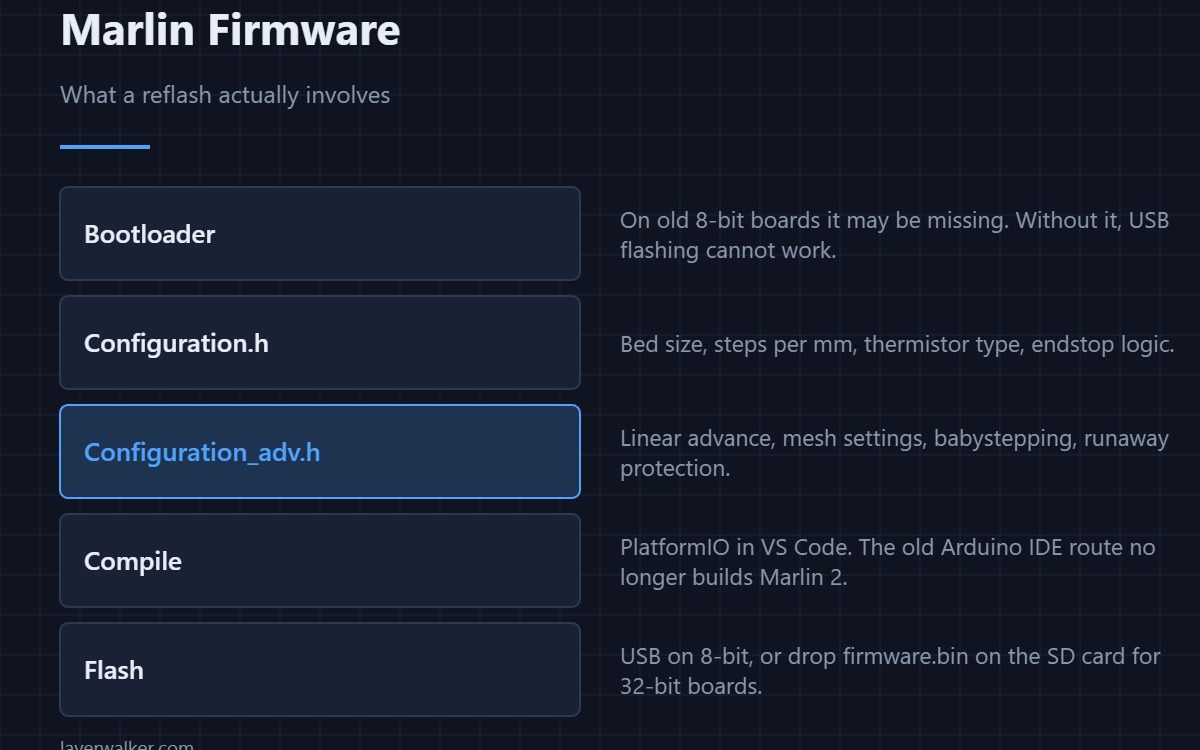
- Identify the board. Open the case and read the silkscreen: 1.1.4 is 8-bit, 4.2.2 and 4.2.7 are 32-bit. Which one you have depends on which Ender 3 you own, and guessing is how people brick printers.
- Check for a bootloader. Old 8-bit Creality boards often shipped without one, and without a bootloader you cannot flash over USB at all — you need an ISP programmer first.
- Edit Configuration.h: bed size, steps per mm, thermistor type, endstop logic.
- Edit Configuration_adv.h: the leveling, babystepping and linear advance options.
- Build it in PlatformIO under VS Code. The old Arduino IDE route no longer compiles Marlin 2.
- Flash it. USB for 8-bit; for 32-bit, copy firmware.bin to an SD card and power-cycle.
The memory problem on 8-bit boards
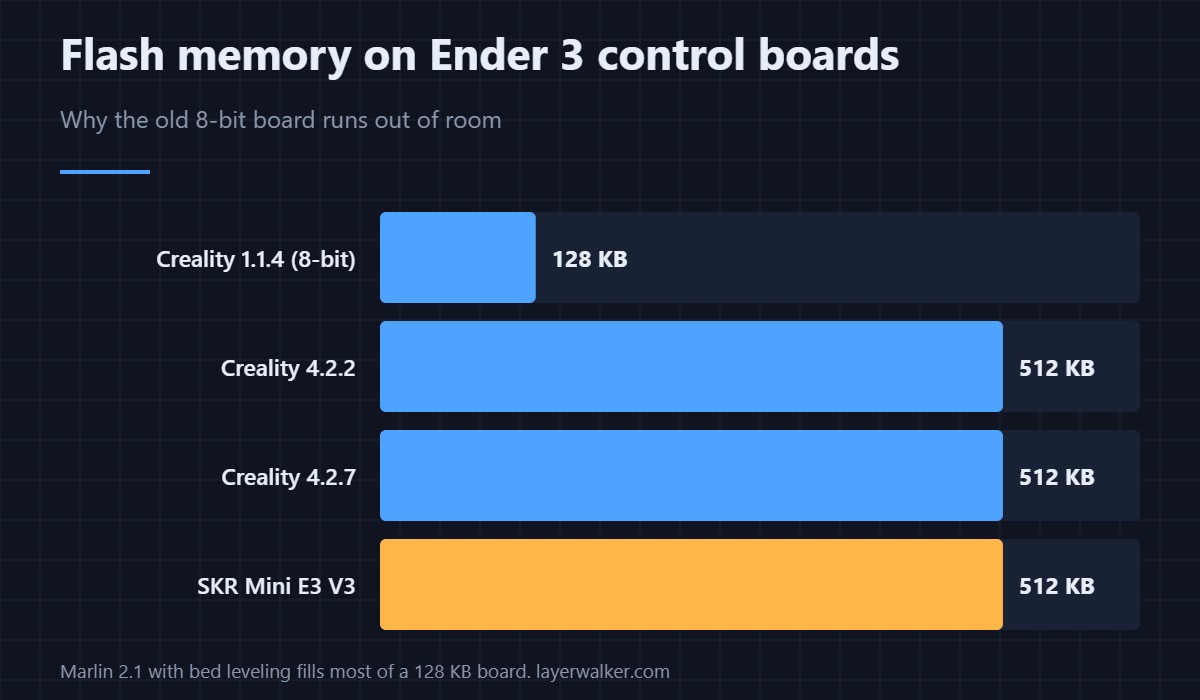
The original Creality 1.1.4 board uses a microcontroller with 128 KB of flash. Marlin 2.1 with bilinear bed leveling, a graphical display and the usual conveniences fills most of it, and adding one more feature produces a build that will not fit. This is why so many probe installations stall halfway: the wiring is right, the firmware will not compile. The practical answer is a 32-bit board, which also happens to make the printer much quieter. Which board a probe needs is covered under choosing a bed leveling sensor.
Marlin firmware settings that matter most
After a successful flash, three things repay the effort. Calibrate steps per mm for the extruder, because every aftermarket extruder differs. Enable and tune linear advance, which sharpens corners more than any hardware you can buy at the same price. And store a bed mesh, then set the Z-offset live — a mesh without a correct offset produces a worse first layer than no mesh at all, which is why hand-tramming still comes first. The order to do things in generally is in upgrading in the right order.
Marlin Firmware FAQ
Do I need to reflash Marlin firmware to add a CR Touch?
Almost always yes. Bed leveling has to be compiled into the build and the probe offsets set. A few later Creality boards shipped with it present but disabled, in which case you only enable it from the menu.
Which Marlin firmware do I use for an Ender 3?
Marlin 2.1 with the configuration files from the official example set for your exact board and model. Start from the example, never from a blank configuration, and change only what you must.
Can flashing Marlin firmware brick my printer?
You can make it unbootable by flashing a build for the wrong board, which is recoverable on 32-bit boards by putting the correct firmware.bin on an SD card. The genuinely unrecoverable case is an 8-bit board with no bootloader, which needs an ISP programmer.
Is Marlin or Klipper better for an Ender 3?
Marlin if you want the printer to be self-contained and simple. Klipper if you want input shaping, pressure advance and a web interface, and do not mind a Raspberry Pi living next to the machine.

LayerWalker
Print defect diagnosis, calibration procedures and parts that actually fit. Corrections welcome through the contact page.