DIY Filament Dryer: A Third of the Price, and It Works
LayerWalker is a participant in the Amazon Services LLC Associates Program. We may earn a commission when you buy through links on our site, at no extra cost to you.
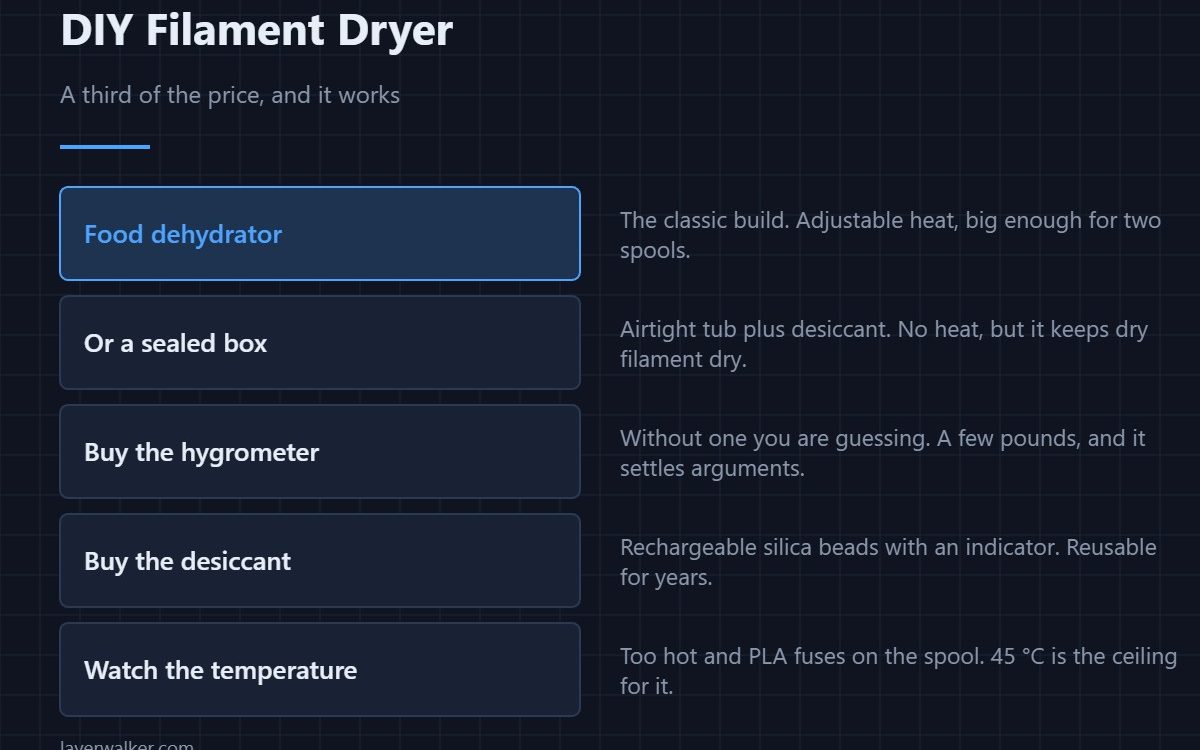
A DIY filament dryer is usually a cheap food dehydrator with the trays removed, and it does the same job as a purpose-built unit for around a third of the price. Two parts are worth buying rather than improvising: a small digital hygrometer, so you know whether it worked, and rechargeable silica beads with a colour indicator. Watch the temperature — PLA fuses on the spool above about 45 °C.
Drying filament is the highest-return maintenance task in 3D printing, and the equipment to do it is unreasonably simple. What a commercial dryer gives you over a dehydrator is a nicer enclosure, a spool holder and the ability to print straight from it. What it does not give you is better drying.
Where to buy

!["Dry & Dry" [1 Quart] Premium Orange Indicating Silica Gel Desiccant Beads(Industry Standard 3-5 mm) - Rechargeable Silica Gel Beads(2 LBS)](https://m.media-amazon.com/images/I/610J1qrNvgL._SL1500_.jpg)

The dehydrator build
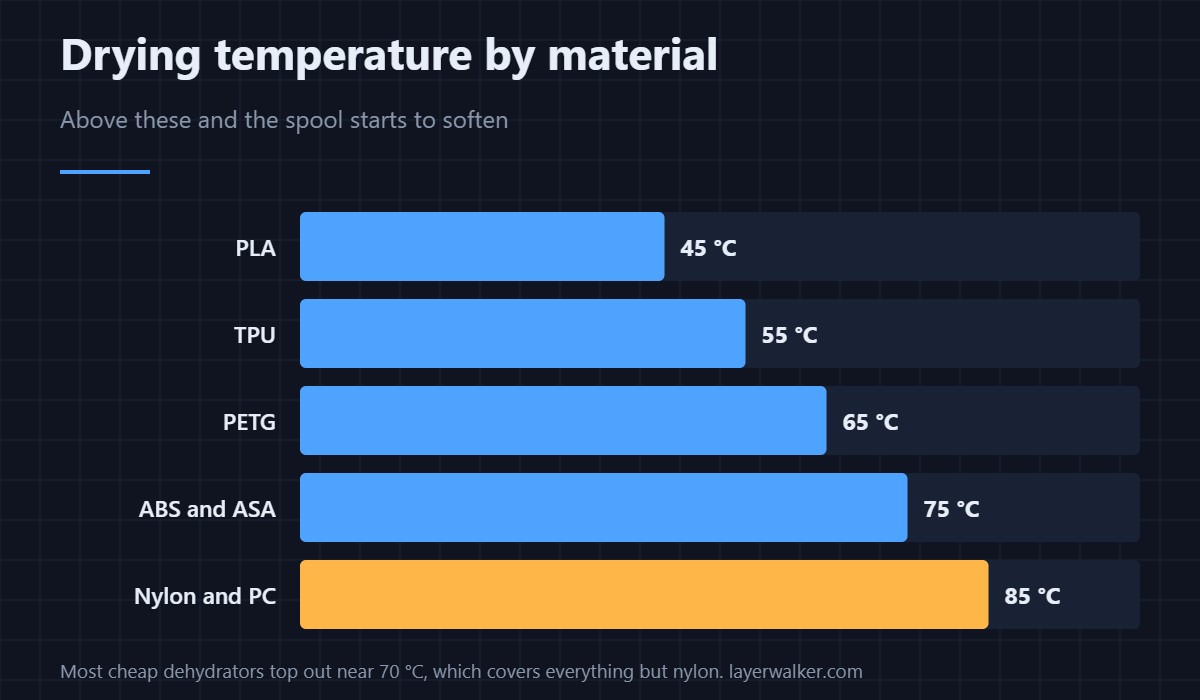
Take a round food dehydrator, remove the middle trays, and stand one or two spools inside. Set the temperature for the material and leave it for six hours or overnight. Cheap models are fixed-temperature and usually land somewhere near 70 °C, which is too hot for PLA but fine for PETG and above; models with a dial are worth the few extra pounds precisely because of PLA.
The two parts worth buying
A digital hygrometer costs very little and converts the whole exercise from faith into measurement. Put it in the box with the spool: below about 20% relative humidity, the filament is dry. Without one you cannot tell whether six hours was enough or whether the container leaks.
Rechargeable silica beads with a colour indicator go orange or blue when saturated and recover in an oven or the dehydrator itself. They last years. Loose sachets from packaging are already saturated and do almost nothing.
Drying against storing
These are different jobs and both are needed. Drying removes water that is already in the filament and needs heat. Storing keeps it out and needs only an airtight container with active desiccant. A spool dried perfectly and then left on a shelf is wet again within days if it is nylon, weeks if it is PETG. The routines are in drying filament and dry boxes.
When to buy a real one instead
Three cases. If you print nylon or PC regularly, you need 85 °C and to feed directly from the dryer while printing, which a dehydrator does not do. If you want it running unattended for hours at a time, a purpose-built unit is designed for that duty cycle. And if bench space is tight, the commercial boxes stack. Otherwise the saving is real — the comparison is in filament dryers.
Safety and the temperature limit
Do not use a kitchen oven. Domestic ovens swing 20 °C or more around their setpoint, and the overshoot is enough to soften a PLA spool into a solid block. Stay under 45 °C for PLA, 55 °C for TPU, and check the spool material too — some cheap plastic spools deform before the filament on them does. Cardboard spools are safe but will sag if the air is humid.
DIY Filament Dryer FAQ
Can I dry filament in a kitchen oven?
Not safely. Domestic ovens overshoot their setpoint by enough to fuse a PLA spool. A dehydrator holds a much steadier temperature, which is the whole point.
How long does filament take to dry?
Six hours for a mildly damp spool, overnight for one that has been open for months. Nylon and PPA take longer and want higher heat. Measure with a hygrometer rather than guessing.
Does a DIY filament dryer work as well as a bought one?
For drying, yes. What you lose is feeding directly from the box while printing, and the higher temperatures nylon and polycarbonate want.
Can I print straight from a dehydrator?
Not easily — there is no spool holder or filament outlet. If you need to print from heat, which nylon effectively requires, that is the case for buying a proper dryer.

LayerWalker
Print defect diagnosis, calibration procedures and parts that actually fit. Corrections welcome through the contact page.