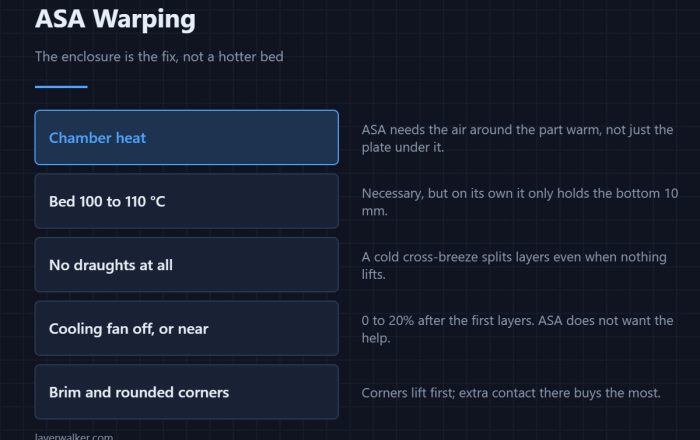
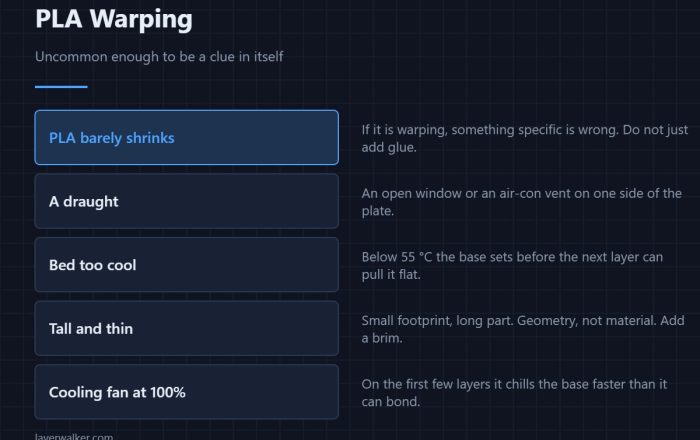
Print detached mid-print and turned into spaghetti
LayerWalker is a participant in the Amazon Services LLC Associates Program. We may earn a commission when you buy through links on our site, at no extra cost to you.
The part released from the plate partway through and the machine kept printing. Look at the base of the failed part: a clean release means adhesion, curled edges mean warping, a scarred face means the nozzle knocked it off.
The debris tells you the cause, so inspect it before cleaning up.
Where to buy


Magigoo MO2016 All-in-One 3D Printer Adhesive Glue for ABS, PLA, PETG, 50mL
3D print came off bed: read the failed part
| Property | Value |
|---|---|
| Flat, clean bottom | adhesion failure, plate contaminated or Z too high |
| Curled edges | warping pulled it free |
| Scarred or gouged side | nozzle collision knocked it off |
| Small footprint, tall part | leverage, needs a brim or raft |
Print found detached with a nest of extruded filament above it
Loss of bed adhesion, warping, or a collision
- Wash the plate with dish soap and hot water, handle it by the edges afterwards.
- Add a brim of 5-8 mm for any part with a small footprint or a tall aspect ratio.
- Check the Z offset with a first layer test patch.
- For high-shrinkage materials, enclose the machine and turn cooling down.
- Reorient tall thin parts to reduce leverage, or print them with a raft.
Catching it earlier
Machines with a chamber camera run spaghetti detection precisely for this. If yours has it, make sure it is enabled and that the camera is actually working — the detection silently stops when the camera errors, and you will not notice until an overnight print fails.
Cleaning up safely
Do not pull a spaghetti nest off a hot nozzle by hand. Let the machine cool, then cut the mass away with flush cutters. Plastic welded to the heater block and sock needs to be softened at low temperature and peeled, not levered off cold.

LayerWalker
Print defect diagnosis, calibration procedures and parts that actually fit. Corrections welcome through the contact page.